Monday, June 24, 2013

Batik 4th Grade 2012-2013

Batik-4th Grade

First, students draw their pictures with very little detail. Next, tape the top and bottom of the fabric over the drawing. Then, tape the sides, stretching to make it tight.

In the pictures below, the students are painting their entire fabric with the melted crayons.  They also, check the coloring using a picture.


Next, they put their fabric 
into one color of dye.
Students crumble their 
painted fabric over the trash can.

Early finishers peel crayons for next year.
The last step is to iron the batik and it makes a print.  I have an old dry press that I use.  I place the dyed batik face down on a white piece of paper and place it between several layers of news paper and   press it in the hot press for a few minutes.


Tuesday, June 18, 2013

SPILLS!

Today is June 18th and this is my first post.
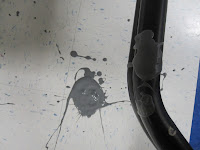
 I have been working on my blog in my head for a while.  This photo is one of the things I have been thinking about-SPILLS.  Sometimes we spill in the art room.  Most of the time it is me who spills things.  So here are the first spill pictures!

My best spill ever!  I shook up a containter of blue glaze and the lid was not all the way on....
.

A hot wax spill while doing batik.
How I fix a perfectly good shirt!
More shirts I have saved from paint splashes!